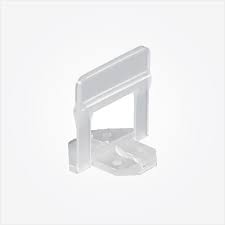
RAIMONDI S/L Spacer Clips 3D
Need a hand?
Give us a call 0800 NZ TRADE or Contact us
RAIMONDI TILE LEVELING SYSTEM 3D SPACERS 1.5 MM (1/16)
Clear 3D clip comes in a flat position and can be bent into its regular RLS position for the wedge to be placed through.
Leveling Spacer Clips (non-reusable)
Joint size: 1/16" (1.5mm)
Tile thickness 1/8" - 1/2" (3mm to 12mm)
Accurate tile setting requires perfect leveling of the tiles.
Often it is hard to properly set ungauged and thin tiles as well as larger format thicker tiles because of uneven floor foundations, as a result, tiles that seem perfectly level during the installation, after the thinset or adhesive cures, they often show a variance in height and can com promise the aesthetics.This can be avoided, thanks to the new Raimondi Leveling Spacers, which will preserve the perfect leveling of the tiles, and will also speed up the installation.
All R.L.S. clips have the breaking point very close to the plane where the tiles lay (1.2 mm – 3/64”). This means the system can be used without any problem even on very thin tiles (3 mm – 1/8”) since it still remains a gap of 1.8 mm (5/64”) for the grout.
R.L.S. clips are made with premium quality plastics whose composition has been severely tested to ensure the perfect balance between elasticity and resistance; indispensable to carry out properly the function for which they were designed
How to Use
3D CLIP UNFOLD With just one hand the clip can be unfolded to its upright position and able to be placed on the area needed.
How to set the support:
1. After having spread the adhesive, insert the support underneath the tiles and along the 4 sides.
2. According with tiles size, set one or more supports on every side of the tile.
3. Set the tile and beat in with a rubber mallet.
How to insert the wedge:
1. Insert the wedge in the support slot carefully not to pass the breaking point.
2. To facilitate this operation, the use of the special traction-adjustable-pliers is recommended.
How to remove the support:
Once the adhesive is set, the protruding part of the support has to be removed by separating it from base. This can be done thanks to the traction-adjustable-pliers, with a rubber mallet or even with feet. Beat parallel to the joint.
LIPPAGE
After the clips and tile have been set place the wedge in the clip and start tensioning it with the pliers
LEVEL
Once the pliers are adjusted and the wedge is tensioned the lippage will start to level out.
VERTICAL
The R.L.S. system can be used vertically on walls, backsplashes, or any vertical configuration using the "wall" pliers
